



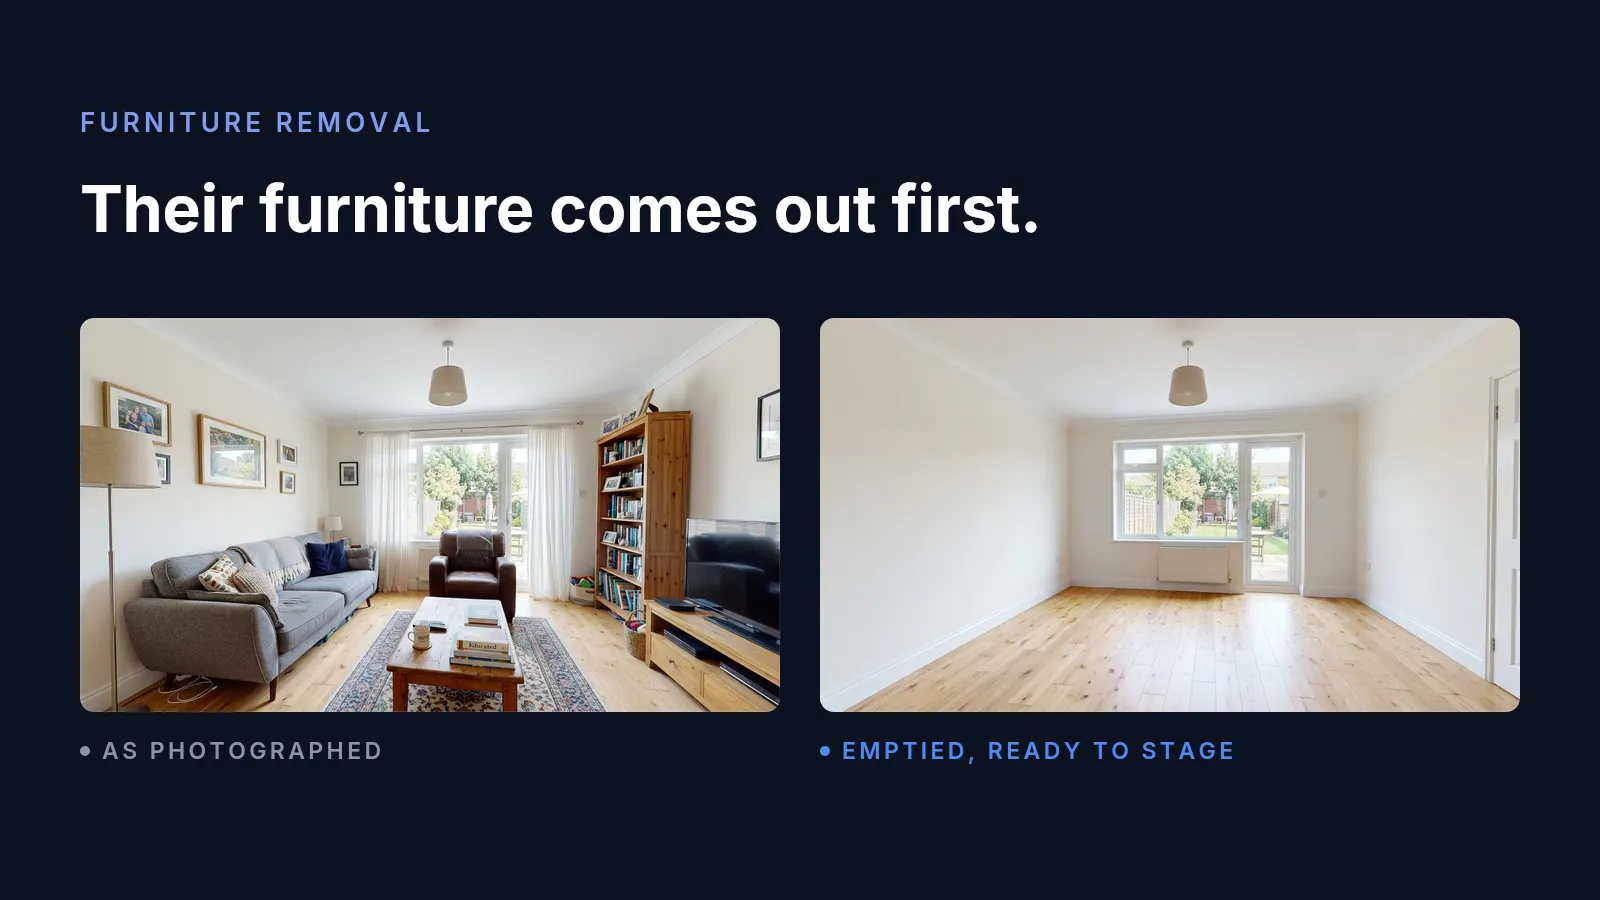
Almost everything written about virtual staging assumes an empty room. Upload the bare space, pick a style, get a furnished photo. That is the easy case, and it is not the one most agents are standing in. The usual listing has somebody living in it, their sofa is in the middle of the frame, and the photographer is booked for Thursday whether or not the house is ready. The question is not how to furnish an empty room. It is what to do about the furniture that is already there.
You get one shoot, and the house is full
Nobody moves out to be photographed. The seller keeps living there until closing, which means the listing photos get taken around their life: their furniture, their colour choices, the chair they like that reads as clutter to everyone else. Waiting for the house to empty is not a plan, because for most sellers it never does.
Agents have always known this, which is why so much of the advice given to sellers is subtractive rather than additive. In NAR’s 2025 staging survey, 51% of sellers’ agents did not stage the home at all but recommended decluttering or correcting faults instead, and 91% of them recommended decluttering specifically, the most common recommendation in the report, ahead of cleaning at 88%. What agents mostly tell sellers to do is take things out.
A photograph is where that advice hits its limit. You can talk a seller into boxing up the family photographs. You cannot talk them into putting their sofa in storage for six weeks, and even if you could, an empty room is not the goal either, since the thing staging reliably does is help a buyer picture living there, and a bare floor does not do that. So the photo needs the furniture gone and different furniture back. On a real listing, that happens after the shutter closes or it does not happen at all.
Clear the room before you furnish it
The instinct is to hand the model the furnished photo and ask it to restage the room in one go. It mostly disappoints, and the reason is worth understanding, because it is the difference between a usable photo and twenty regenerations.
Asked to restage a furnished room in a single pass, a model treats the existing furniture as part of the scene it is meant to keep coherent. What comes back is the old sofa nudged, recoloured or half-dissolved into a new one, an ottoman that used to be a coffee table, and a rug that is somehow both patterns at once. The room fights you because you asked one instruction to do two contradictory things: preserve this photograph, and contradict it.
Separate the two jobs and each one gets easy.
- Pass one, removal. The only instruction is this object is not here. The model’s job is to reconstruct the floor, wall and skirting board that the object was covering. It is an inpainting problem with a right answer, and the room around it tells the model what that answer looks like.
- Pass two, staging. Now you are back in the easy case that every virtual staging tool is built for: an empty room, a style, a furnished result.
Stagify does both, in the place you would expect. Furniture removal runs on the upload itself, and inside the Masking Studio you can set any area to Remove object, which is the surgical version: one rug, one recliner, the exercise bike in the corner, leaving the rest of the photograph untouched. Both are Stagify+ features; the free plan stages empty rooms, which is the other half of this job.
What comes out, what stays, and what must never move
Removal is a stronger claim than staging. Furnishing an empty room adds something a buyer can plainly see is not included. Deleting furniture edits the photograph of a room somebody lives in, and the line between “their things” and “the house” is where listings get into trouble. Three tiers, and the middle one is the one people get wrong.
Contents come out. Sofas, beds, desks, rugs, lamps, televisions, the treadmill, the laundry basket, the family photographs on the shelf. None of it conveys with the house and none of it is what the buyer is purchasing. This is the whole legitimate target of a removal pass.
Structure stays. Walls, windows, doors, flooring, ceiling height, radiators, skirting, and anything bolted down. Built-in shelving, fitted wardrobes and kitchen cabinetry are structure even though they look like furniture, and so is the light fitting if it is staying with the house. The test is simple: if it is still there on completion day, it is in the photograph.
Defects never move. Cracked tiles, water stains, damp patches, a hole in the plasterboard, a scorched worktop. A removal pass will happily clear a sofa and, if you are careless about where the mask lands, the stain the sofa was sitting next to. That is no longer staging. Nothing about “I only meant to remove the couch” helps afterwards.
The same disclosure rules apply to a removal as to any other edit: a virtually staged photo has to be labelled, most MLSs require it, and in California it is statute. The state-by-state position is here. Label the photo whether you added furniture, removed it, or both.
Where the removal falls apart
Five specific things break a removal pass, and all of them are decided before you upload anything. Knowing them is mostly a photography brief.
- Mirrors and glass. A mirror on the wall still holds the reflection of the sofa you just deleted, and so do a glass coffee table, a television screen and a dark window at night. The model clears the object and leaves its ghost. Check every reflective surface in the frame before you accept a result.
- Rugs. A rug hides the floor, so removing it means inventing the flooring underneath: pattern, direction, plank width and all. On plain carpet that is trivial. On the patterned rug over oak boards in the photo at the top of this page it is the hardest thing in the frame, and it is the first place a careful buyer’s eye lands.
- Shadows and light spill. Furniture casts shadows and blocks light. Take the object away and its shadow sometimes stays, or the patch of floor where it stood stays darker than everything around it. Bright, even, diffuse light, with the curtains open and the lamps off, leaves far less for the model to unpick.
- What the furniture was covering. A wall of framed photographs leaves nail holes, hooks and sun-faded rectangles. A tall bookcase leaves a clean patch on a wall that has yellowed everywhere else. The model will guess, and its guess will be a flat, plausible wall that does not quite match the one beside it.
- Doorways. Clear the living room and the doorway is still showing a corner of the furnished dining room beyond it. Removals are per photo; the frame does not stop at the wall.
Two habits help more than any prompt wording. Shoot from one corner at roughly chest height, so walls and floor meet in straight lines, because a tilted camera gives the model converging geometry to rebuild. And shoot the room slightly wider than you need. Cropping in afterwards is free; asking the model to reconstruct a floor that runs off the edge of the frame is not.
The cheapest pass is the one you do with your hands
Anything physically carried out of the room before the shoot never has to be removed, reconstructed or disclosed. That sounds obvious and it is routinely skipped, because editing feels cheaper than lifting. It is not, and the list of what to move is short:
- Anything small and personal. Photographs, certificates, the children’s artwork, medication, post on the counter. These are the things that stop a buyer picturing themselves in the room, and they fit in a box.
- Worktop and surface clutter. Kettles, toasters, toothbrushes, chargers, the drying rack. A cleared kitchen worktop is the highest-value ten minutes in the house.
- Bins, laundry baskets, pet bowls, litter trays. Small, awkward to remove convincingly, and instantly recognisable when it is done badly.
- One piece of furniture per room, if any goes. The dining room with six chairs instead of eight photographs better and is one fewer object to reconstruct.
This is the same argument as buying the staging consultation and doing the work yourself, which is the best-value option on the whole staging bill. The consultation costs a few hundred dollars and tells you what is actually wrong with the house; no virtual tool touches any of it, and all of it shows up in the photographs. The exterior is the same story. 77% of agents recommend improving curb appeal, and a parked car is easier to drive away than to edit out.
Which rooms are worth the effort
Not every room repays a removal pass. Agents already concentrate on a handful, and the NAR figures are a fair ranking of where buyers look: the living room (91%), the primary bedroom (83%), the dining room (69%) and the kitchen (68%). Guest and children’s bedrooms sit far behind, at 22% each.
Kitchens are the exception. They are high on that list but a poor removal target, because a kitchen is mostly structure: cabinetry, worktops, splashback, appliances. The only things that legitimately come out are the clutter on the surfaces, which you should have moved by hand anyway. Bathrooms are the same. In practice the rooms worth two passes are the living room, the primary bedroom, and the dining room if it is doubling as somebody’s office.
The workflow
- Send the seller a list a week out. Personal items, surface clutter, bins and baskets, one piece of furniture per room. Boxes, not decisions.
- Shoot wide, level and bright. One corner, chest height, curtains open, lamps off, doors to unstaged rooms closed.
- Remove, and check the result before you go on. Reflections, the floor under the rug, shadows, the wall behind the pictures. A bad removal cannot be fixed by staging on top of it.
- Save the emptied photo. That is the master copy for every staging that follows.
- Stage the empty room. Preset styles for speed, or the Masking Studio when a specific piece belongs in a specific spot.
- Label it. “Virtually staged” on every edited photo, in the caption your MLS expects.
Step four is the one people skip. Removal is the expensive pass and the one with failure modes; staging is the cheap, repeatable one. Do the hard pass once, keep the result, and every later version of the listing is an afternoon rather than a reshoot.
Sources & notes
- NAR: Report Reveals Home Staging Boosts Sale Prices and Reduces Time on Market (May 2025), reporting the 2025 Profile of Home Staging. Source for the 51% who recommended decluttering or correcting faults instead of staging, the 91% decluttering / 88% cleaning / 77% curb appeal recommendations, and the staged-room percentages (living room 91%, primary bedroom 83%, dining room 69%, kitchen 68%, guest and children’s bedrooms 22% each). Survey methodology: 49,806 Realtors invited, 1,266 usable responses, a 2.5% response rate, collected February 2025.
- There is no published figure for what share of listed homes are occupied at the time of the photo shoot, and this article does not invent one. “Most” here is the ordinary experience of listing agents rather than a measured statistic; the NAR recommendations above are the closest thing to evidence for it, since advice to declutter is only advice you give about a house somebody is living in.
- Staging cost figures, the occupied versus vacant split and the case for buying the consultation are sourced in The Median Staging Bill Is $1,500, where the citations live, so they are not repeated here.
- Disclosure requirements for virtually staged photographs, including California’s statute, are covered with citations in Do You Have to Disclose Virtual Staging?
- The failure modes in “Where the removal falls apart” describe how image models behave on this task rather than measured error rates, which nobody publishes. Treat them as a checklist for reviewing a result, not as probabilities.
- The cover image is one room in two states. Both were produced with Stagify: the furnished photograph was generated, and the empty version beside it is that same photograph put through the furniture-removal pass this article describes, with nothing retouched by hand afterwards.